Adding new users allows you to give team members access to Liradocs based on their roles and responsibilities. Follow the steps below to create a new user.
Step 1: Navigate to Staff & Users
Go to Settings in Liradocs.
Click on Staff & Users.
Step 2: Click on “Add User”
On the Staff & Users page, click the Add User button to start creating a new user.
Step 3: Enter User Details
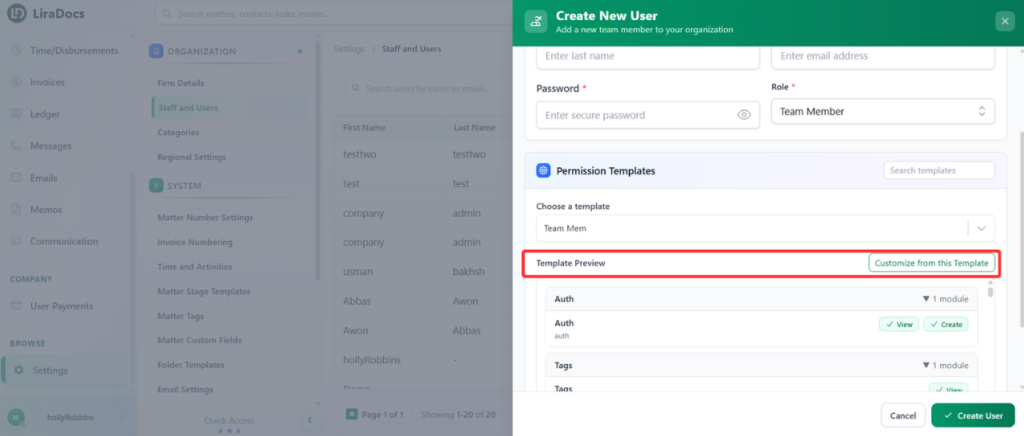
Fill in the required information for the new user:
Username: Enter a unique username
First Name: Enter the user’s first name
Last Name: Enter the user’s last name
Email Address: Provide a valid email address
Password: Set a password for the user
Step 4: Assign a Role
Select the appropriate role for the user:
Admin: Full access to system features and settings
Team Member: Limited access based on assigned permissions
Step 5: Select and Configure Permission Template
Permission templates define what actions a user can perform in Liradocs.
Select a Permission Template from the list.
To customize it, click on the template to edit permissions.
You can enable or disable permissions for different features. For example:
In the Memos section, you can allow permissions such as:
View memo
Create memo
Edit memo
Delete memo
Select the permissions based on the user’s responsibilities.
Step 6: Create the User
Once all details and permissions are set, scroll down.
Click on the Create User button.
The new user is now successfully created and can log in to Liradocs using their credentials.