


How to Create a Time Activity
Time activities in Liradocs are used to record the time spent on work, whether billable or non-billable. These records help ensure accurate time tracking and are automatically included in client invoices when linked.
Follow the steps below to create a new time activity.
Understanding Time Activities
A time activity allows you to:
Record billable and non-billable hours
Track work performed on matters
Link activities directly to invoices
Ensure accurate client billing
Time activities can be created as Fee, Time, or Disbursement. In this guide, we will focus on creating a Time activity.
Step 1: Navigate to Time & Activities
Go to Settings in Liradocs.
From the settings menu, select Time & Activities.
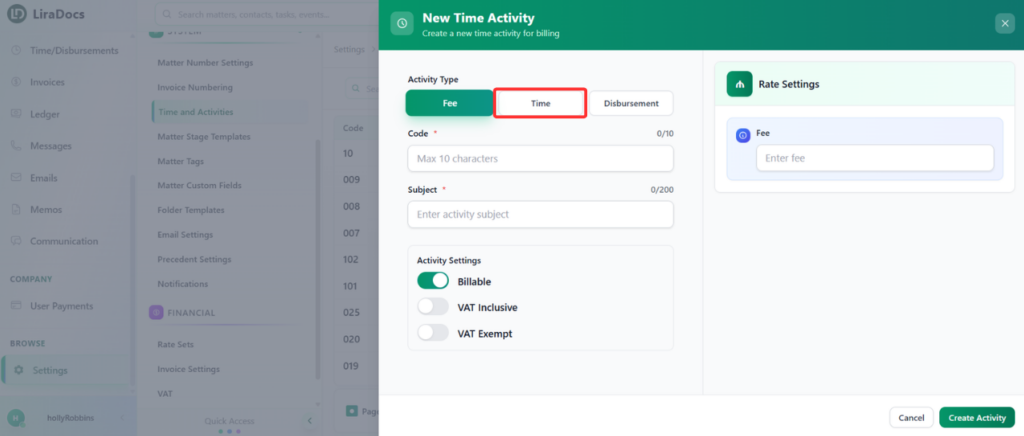
Step 2: Create a New Activity
Click on the Create Activity button.
In the activity type, select Time.
Step 3: Enter Activity Details
Fill in the required information:
Activity Code: Enter a unique code for the activity.
Subject: Add a short description of the activity.
Duration: Specify the time spent (e.g., 2 hours).
Step 4: Set Billing Options
Choose whether the activity is:
Billable, or
Non-billable
Select the VAT option:
VAT Inclusive, or
VAT Exempt
Step 5: Configure Rate Settings
In the rate settings section, choose how the rate should be applied:
Do Not Override Rate: Use the default rate
Override Rate for All Staff
Override Default Rate Per Staff Member
Select the option that best fits your requirement. For example, you can choose Do Not Override Rate to keep the default settings.
Step 6: Create the Activity
Once all details are filled in:
Click on the Create Activity button.
Your time activity will now be successfully created in Liradocs.
This allows you to efficiently track work time and ensure accurate billing for your clients.
