


How to Use Filters in Contacts
Filters and search options in Liradocs help you quickly find and manage contacts in your system. By applying filters, you can narrow down the contact list based on status or type, making it easier to locate specific records.
Follow the steps below to use filters and search within the Contacts section.
Step 1: Go to the Contacts Tab
Open Liradocs.
Navigate to the Contacts tab.
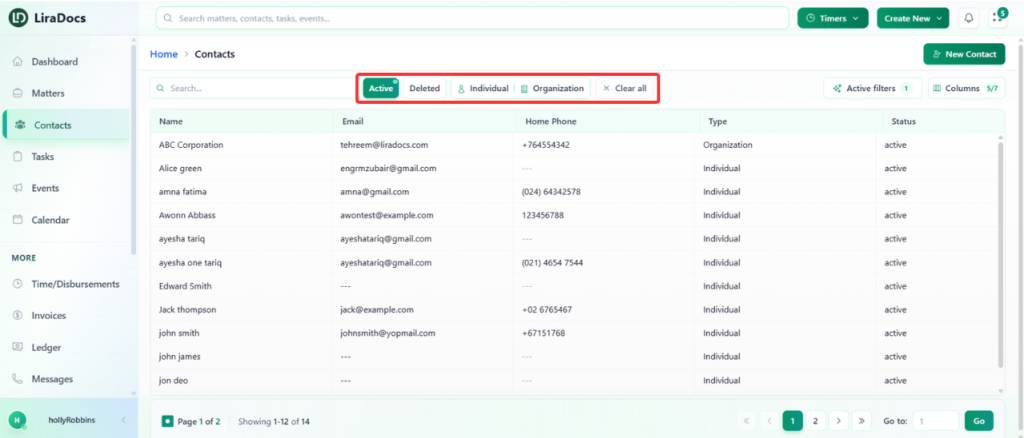
By default, the Active filter is already selected. This displays all contacts that are currently active in the system.
Step 2: View Deleted Contacts
Click on the Deleted filter.
This will display a list of contacts that have been deleted from the system.
Step 3: Filter Contacts by Type
You can further refine your results by applying contact-type filters.
View Individual Contacts
Click on Individual.
If the Deleted filter is already active, selecting Individual will show deleted individual contacts.
View Active Individual Contacts
Click on Active while Individual is selected.
This will display all active individual contacts.
View Organizational Contacts
Click on Organization.
Liradocs will display all active organizational contacts.
Step 4: Clear All Filters
At any time, you can remove all applied filters:
Click Clear Filters.
This will reset the contact list and show all available contacts.
Step 5: Search for a Specific Contact
Locate the Search Bar in the Contacts section.
Type the name of the contact you want to find.
As you type, Liradocs will instantly display the matching contact results.
Using filters and the search function allows you to quickly locate specific contacts and manage your contact list more efficiently in Liradocs.
