


How to Create an Individual Contact
In Liradocs, contacts allow you to store and manage information about individuals and organizations associated with your matters. Creating individual contacts helps your firm keep client and stakeholder information organized and easily accessible.
Follow the steps below to create a new individual contact.
Step 1: Navigate to Contacts
Open Liradocs.
Go to the Contacts section.
Click the New Contact button to start creating a new contact.
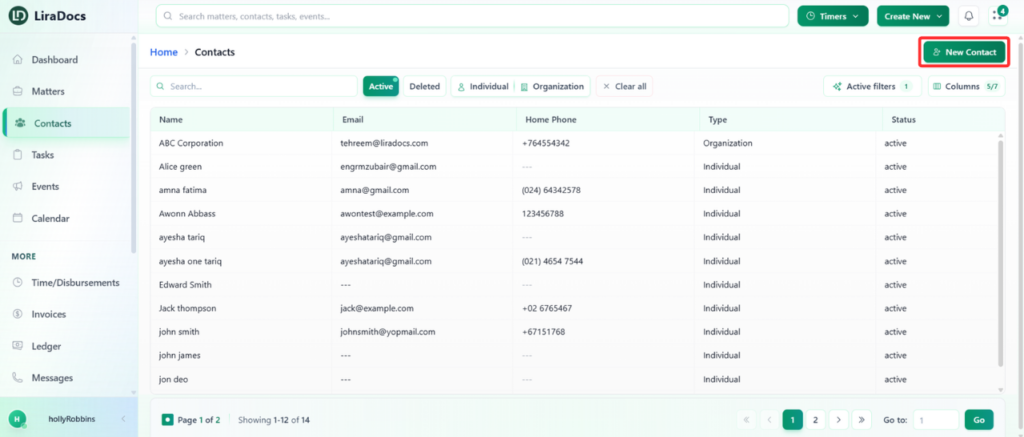
Step 2: Select Contact Type
Ensure that Individual is selected as the contact type.
This option is used for adding personal contacts such as clients, witnesses, or other individuals.
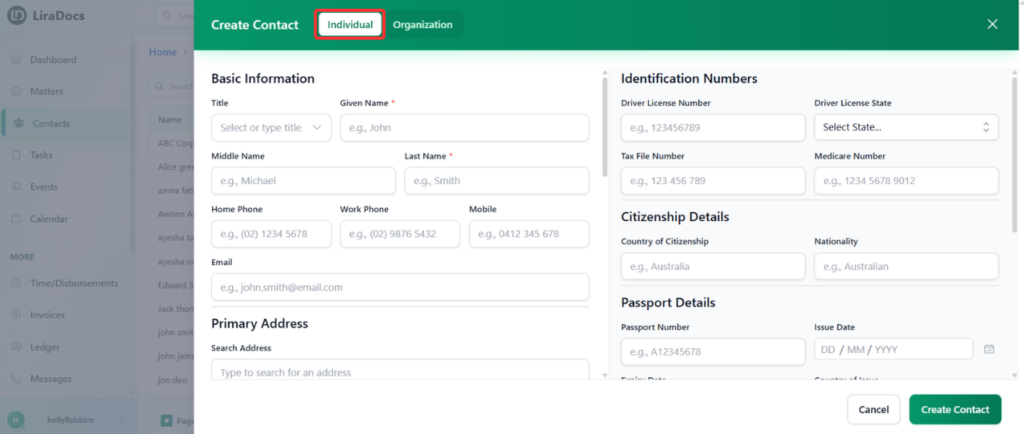
Step 3: Add Basic Information
Enter the First Name and Last Name of the individual.
These fields are mandatory.
Other fields such as additional details can be filled in if required.
Add the individual’s phone number(s) and email address.
Step 4: Add Address Details
Enter the Primary Address of the individual.
Include relevant address information to ensure accurate contact records.
Step 5: Enter Bank Details (Optional)
If required, add the bank details of the contact.
This information can be useful for financial or payment-related records.
Step 6: Complete VOI Details
Go to the VOI (Verification of Identity) section.
Indicate whether the VOI has been completed.
Step 7: Add Execution Party Details
Enter the Execution Party details.
If applicable, specify whether Power of Attorney applies to this individual.
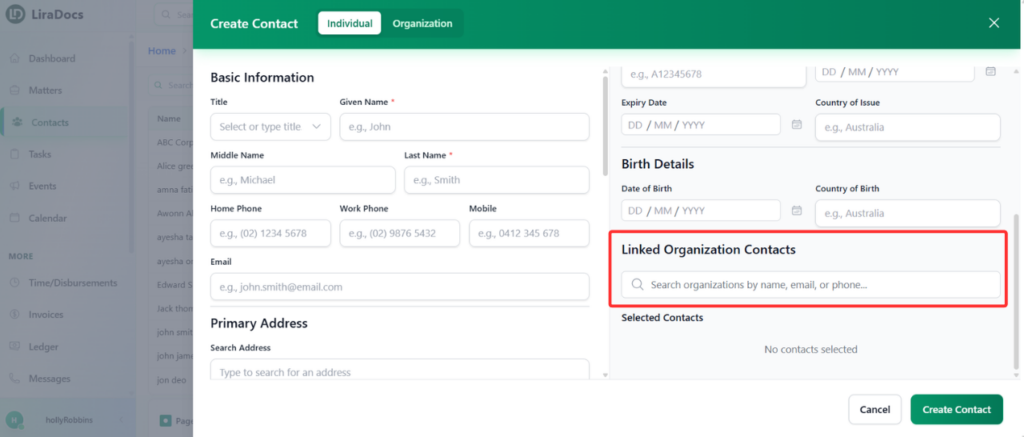
Step 8: Add Identification Information
Enter the individual’s Identification Number.
Fill in additional information such as:
Citizenship details
Passport details
Birth details
Step 9: Link to an Organization (Optional)
If the individual is associated with an organization, select the relevant organization from the available list.
This helps connect the contact with the appropriate organization in the system.
Step 10: Create the Contact
After completing the required information, click the Create Contact button.
The new individual contact will now be successfully created and saved in Liradocs.
Once created, the contact can be used across matters, communications, and other records within the system.
